I can’t believe I finally found this again! My grandma used to make these for holiday parties, and I’d sneak as many as I could without getting caught 😅 A true guilty pleasure… and my heart is so happy to taste them again ❤️ 🥯
I can’t believe I finally found this again! My grandma used to make these for holiday parties, and I’d sneak as many as I could without getting caught 😅 A true guilty pleasure… and my heart is so happy to taste them again ❤️ 🥯
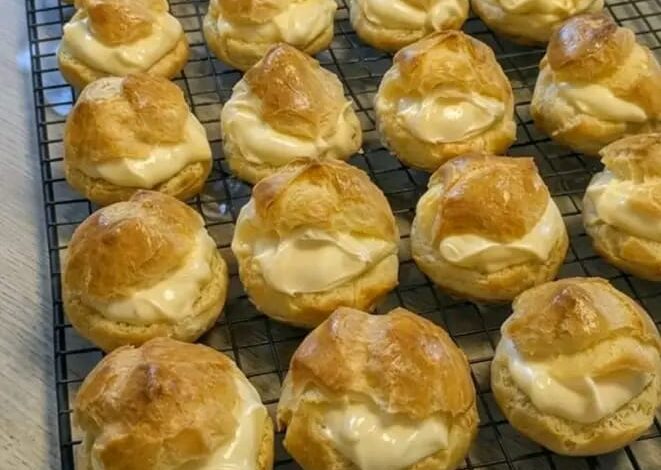
We all have that one treat from our childhood that feels like a warm hug, don’t we? For me, it was Grandma’s legendary cream puffs. I remember hiding under the dessert table at every holiday party, waiting for the perfect moment to “borrow” one (or three!) before the guests arrived. The way the crisp shell gave way to that cool, silky vanilla cream… it was pure bliss.
After years of searching for the exact ratio, I’ve finally mastered it. These Nostalgic Vanilla Dream Puffs are light, airy, and stuffed so full of cream that every bite is an experience. If you want to bring a piece of vintage heaven to your kitchen, this is the only recipe you’ll ever need!
🛒 The Heritage Ingredients (Perfectly Proportioned)
Don’t let the elegance of these puffs intimidate you. The beauty of Grandma’s cooking was using simple, high-quality ingredients to create something extraordinary.
For the Golden Choux Pastry:
1 cup (240ml) Water (or half water, half milk for a richer shell)
1/2 cup (115g) Unsalted butter, cut into small cubes
1 cup (125g) All-purpose flour, sifted
1/2 teaspoon Salt
1 teaspoon Granulated sugar (helps with that beautiful golden color)
4 large Eggs (room temperature is a must!)
For the Signature Vanilla Pastry Cream:
2 cups (500ml) Whole milk
1/2 cup (100g) Granulated sugar
4 large Egg yolks (save the whites for an omelet!)
1/4 cup (30g) Cornstarch
2 tablespoons Unsalted butter
1 tablespoon Pure vanilla extract (or the seeds from one vanilla bean for those fancy black specks)
1 cup (240ml) Heavy cream, whipped to stiff peaks (Grandma’s secret for a lighter filling!)
🔥 The Step-By-Step Process (The Path to Pastry Perfection)
1. Creating the Dough Foundation 🌡️
Preheat your oven to 425°F (218°C). In a medium heavy-bottomed saucepan, combine the water, butter, salt, and sugar. Bring it to a rolling boil over medium-high heat. As soon as it boils, remove it from the heat and dump in the flour all at once. Stir like your life depends on it! Put it back on low heat and keep stirring for about 2 minutes. You’re looking for a thin film to form on the bottom of the pan—that’s when you know the flour is “cooked” and ready.
2. The Egg Integration 🥚
Transfer the hot dough to a bowl and let it cool for 5 minutes (you don’t want to scramble your eggs!). Using a stand mixer or a wooden spoon, add the eggs one at a time. Make sure the egg is completely incorporated before adding the next one. By the last egg, your dough should be smooth, glossy, and fall slowly from the spoon in a “V” shape.
3. Piping and Pumping Up 🥯
Line a baking sheet with parchment paper. Use a piping bag with a large round tip (or just a spoon!) to create mounds about the size of a golf ball. Use a wet finger to gently push down any “points” on top so they don’t burn. Bake at 425°F for 10 minutes, then lower the heat to 375°F (190°C) and bake for another 15-20 minutes until they are golden and feel light when picked up. Pro Tip: Poke a tiny hole in the side of each puff right after they come out to let the steam escape—this keeps them from getting soggy!
4. The Custard of Your Dreams 🍮
While the puffs cool, heat your milk in a pan until it just starts to simmer. In a separate bowl, whisk the egg yolks, sugar, and cornstarch. Slowly pour a little hot milk into the egg mixture to “temper” it, then pour everything back into the pan. Whisk constantly over medium heat until it thickens into a rich custard. Remove from heat, stir in the butter and vanilla, and chill completely in the fridge with plastic wrap touching the surface.
5. The “Grandma” Twist ☁️
Once the custard is cold, fold in your whipped heavy cream. This “Diplomat Cream” is what makes these puffs so much better than store-bought versions. It’s airy, stable, and decadently creamy.
6. The Final Reveal 🏗️
Slice the tops off your cooled puffs (or use a piping tip to fill them from the bottom). Spoon or pipe a generous amount of the vanilla cream into each shell. Put the “hat” back on and, if you’re feeling extra festive, dust them with a light coating of powdered sugar.
❤️ Why you NEED to hit that LIKE button and SAVE this!
This recipe is a labor of love that rewards you with the best dessert you’ve ever tasted. It’s perfect for showers, birthdays, or—like in my family—just because it’s the weekend! These puffs disappear faster than you can make them, so you might want to double the batch. 🤤
Drop a “❤️” in the comments if you have a favorite childhood dessert memory! Make sure to SAVE this post so you can recreate Grandma’s magic whenever you need a smile! ✨