Sure! Here’s a comprehensive guide titled:
—
🌱 Grow Your Own Clove Plant at Home: A Unique Way to Enjoy Fresh Spice All Year Round
—
🌿 Introduction
Imagine plucking a fresh clove from your own homegrown plant and adding it straight into your curry or tea. Clove (Syzygium aromaticum) is a warm, aromatic spice native to Indonesia that’s cherished around the world—not only for its culinary magic but also for its medicinal properties. Growing clove at home is not just rewarding—it brings nature indoors and guarantees a year-round supply of this flavorful spice.
—
🧬 Origin & Cultural Significance
Cloves originated in the Maluku Islands (Spice Islands) of Indonesia. They have played a critical role in spice trade history, symbolizing wealth and power. In many cultures, cloves are used during festivals, religious rituals, and as natural remedies. In Ayurvedic and Traditional Chinese Medicine, cloves are used to treat everything from toothaches to indigestion.
—
🪴 Ingredients / Materials Needed
Item Quantity
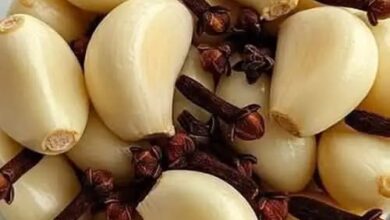
Whole clove buds (dried, unprocessed) 5–10
Small pot with drainage holes 1
Rich, well-draining potting mix (peat + sand + compost) Enough to fill pot
Water As needed
Spray bottle (optional) 1
Clear plastic bag or humidity dome 1
Grow light or sunny window 1 location
—
✨ Optional Additions
Organic compost or worm castings
Natural rooting hormone (for better germination)
Mulch to retain soil moisture
Decorative pot to make it a kitchen accent
—
💡 Tips for Success
Use untreated whole clove buds—avoid supermarket cloves that may be irradiated or too old.
Soak cloves in warm water for 24 hours to help with germination.
Maintain high humidity using a plastic cover.
Be patient—germination may take 2–6 weeks.
Clove trees prefer tropical conditions: warm temperatures (70–85°F / 21–29°C) and indirect sunlight.
—
📝 Instructions
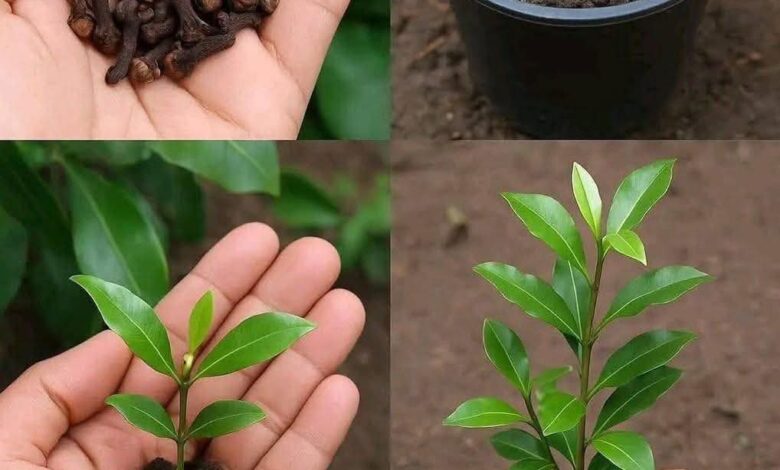
1. Select Viable Clove Buds: Choose plump, whole cloves—not broken or powdered.
2. Soak the Cloves: Place in warm water for 24 hours.
3. Prepare the Pot: Fill with moist, well-draining potting mix.
4. Plant the Cloves: Insert soaked cloves vertically (bud side up), about ½ inch deep.
5. Cover and Create Humidity: Use a clear plastic bag over the pot to trap moisture.
6. Place in Warm Light: Keep in a bright, warm area (but not direct hot sun).
7. Water Lightly: Mist the soil every few days—don’t overwater.
8. Transplant Later: Once the plant grows 3–4 inches tall, move to a larger pot or your garden (if climate allows).
—
🌟 Description
This DIY project lets you experience the joy of growing a rare spice at home. The clove plant is an evergreen with glossy leaves and a beautiful aroma. It makes for a great conversation piece in your kitchen or indoor garden. Though it may take years to flower and produce cloves, the plant itself is ornamental and beneficial.
—
🥗 Nutritional Information (per dried clove)
Nutrient Amount
Calories 6 kcal
Carbs 1.4g
Fiber 0.7g
Vitamin C 1.6mg
Manganese 0.06mg
Note: Consumed in small amounts, cloves are potent in antioxidants and have strong antimicrobial properties.
—
✅ Conclusion
Growing your own clove plant at home is a fulfilling journey into sustainable living. Whether you’re a gardening enthusiast or a spice lover, cultivating cloves connects you to ancient traditions while offering fresh, healthful flavor year-round.
—
🌱 Recommendation
Start small—with just a few cloves—and grow your confidence along with your plant. Document the growth, involve your family or kids, and add homegrown spice to your favorite dishes!
—
🌼 Embracing Healthful Indulgence
By nurturing a clove plant, you’re doing more than gardening—you’re embracing a lifestyle that values fresh ingredients, holistic wellness, and eco-conscious choices. It’s a unique way to indulge your senses while honoring the wisdom of the earth.
—
👇 Full recipe in first comment
Let me know if you’d like me to format this into a downloadable or social-media-friendly post too!