🍫 THE ULTIMATE MIDNIGHT VELVET DREAM: DARK CHOCOLATE & SILKY PEANUT BUTTER LASAGNA 🍫
🍫 THE ULTIMATE MIDNIGHT VELVET DREAM: DARK CHOCOLATE & SILKY PEANUT BUTTER LASAGNA 🍫
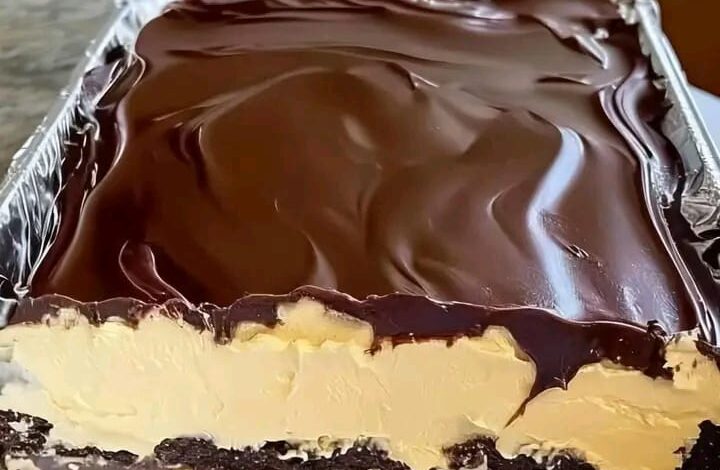
Have you ever looked at a dessert and felt your soul depart for a moment? Stop scrolling, feast your eyes on that photo, and get ready, because we are about to create a legend. This isn’t just a cake; it’s a sinful stratification of pure pleasure—a perfect tactical strike between dark cocoa crunch, velvety peanut butter silk, and a mirror-finish chocolate ganache that is simply out of this world. 🤤✨
This is the undisputed king of party desserts. It’s the kind of treat that brings an entire room to a sudden, appreciative silence. It’s bold, it’s rich, and it hits that magical sweet-and-salty “bliss point.” If you want to drive your followers crazy and satisfy your deepest cravings, follow every single step of this Midnight Velvet Dream. 🚀🔥
🛒 WHAT YOU NEED (THE HOLY INGREDIENTS) 🛒
To build this masterpiece, you need high-quality ingredients. No shortcuts allowed when we’re chasing perfection! Here are the doses for a family-sized tray (because trust me, everyone will beg for seconds):
The Cookie Foundation (Base Layer):
450 grams of Dark Chocolate Sandwich Cookies (like Oreos; remove the cream if you want it extra dark)
115 grams of High-Quality Unsalted Butter (melted)
A generous pinch of Sea Salt to amplify the cocoa notes
The Silk Peanut Layer (The Heart):
500 grams of Full-Fat Cream Cheese (room temperature for extreme creaminess)
350 grams of Creamy Peanut Butter (stick to “smooth” for that velvet texture!)
200 grams of Powdered Sugar (sifted to eliminate lumps)
400 milliliters of Heavy Whipping Cream (must be ice-cold from the fridge!)
1 teaspoon of Pure Madagascar Vanilla Extract
The Mirror Ganache (The Crown):
300 grams of Semi-Sweet or Dark Chocolate (60-70% cocoa, finely chopped)
250 milliliters of Heavy Cream
30 grams of Cold Butter (cubed, for that professional photoshoot shine)
🔥 THE MASTERPIECE PROCESS (STEP-BY-STEP) 🔥
1. Building the Foundation 🧱
We start with the soul of the dish: the crunch. Pulse your cookies in a food processor until they look like dark sand. Pour in the melted butter and salt, stirring until every crumb is “wet.” Press the mixture firmly into a tray lined with foil. Use the back of a spoon to pack it tight—solidarity is key here! Freeze for 15 minutes to set.
2. The Whipped Silk Dream ☁️
In a large bowl, beat the cream cheese, powdered sugar, and peanut butter until it looks like beige velvet. In a separate chilled bowl, whip your heavy cream and vanilla until stiff peaks form. Now, the chef’s secret: gently fold the whipped cream into the peanut butter mixture using slow, circular motions. You want to keep all that air inside for a cloud-like texture.
3. The Layering Art 🎨
Retrieve your base from the freezer. Spread half of the peanut butter silk over the cookies. Optional Pro Tip: Sprinkle a few extra cookie crumbs in the middle for an hidden “crunch” layer. Top with the remaining cream and level it off with a spatula until perfectly flat. Back into the fridge it goes! Patience is the hardest ingredient.
4. The Dark Chocolate Crown 👑
Time for the ganache. Heat your cream until it just begins to simmer, then pour it directly over your chopped chocolate. Let it sit for one minute—don’t touch it! Then, slowly whisk from the center outward. Watch the magic happen as it turns into a glossy, dark liquid. Stir in the cold butter cubes for that extra “wow” shine. Pour it over the chilled cake and tilt the pan to let it flow naturally to the edges.
5. The Final Rest ❄️
The hardest part: DO NOT eat it yet! This beauty needs to set in the fridge for at least 6 hours (overnight is best). The flavors need to marry, and the textures need to stabilize. This is how you get that perfect, clean slice seen in the photos.
✨ TIPS FOR THE PERFECT SHOT (MAXIMIZE YOUR LIKES!) ✨
The Clean Cut: Before slicing, dip your knife in hot water and wipe it dry. This ensures those beautiful, distinct layers stay sharp and visible! 📸
The Garnish: For extra flair, sprinkle some Maldon sea salt or crushed toasted peanuts on top right before serving.
The Lighting: Shoot your photo near a window with natural light to make that ganache shine like a mirror! 🌟
Craving a bite yet? Save this recipe, tag a friend who owes you a dessert, and hit that LIKE button if you think this is the ultimate treat! 👇🔥