🍪 THE ULTIMATE “COOKIE DOUGH OVERLOAD” NO-CHURN DREAM CUP 🍪
Stop scrolling! 🛑 You just found the Holy Grail of dessert cravings. If you are a fan of that thick, creamy, buttery cookie dough flavor, this recipe is about to change your life forever. Forget those tiny pints from the grocery store that are 90% air and 10% sadness. We are making a mega-sized, over-the-top, chocolate-chip-packed masterpiece right in your own kitchen! 🏠✨
This isn’t just ice cream; it’s a sensory experience. It’s the kind of treat that makes your followers stop their scroll and demand the recipe. Whether you’re hosting a movie night or just had a long day and need some “sweet therapy,” this is the gold standard of homemade indulgence. Let’s get messy and make some magic! 🍦🔥
🍦 THE DECENT LIST OF INGREDIENTS: GO BIG OR GO HOME 🍦
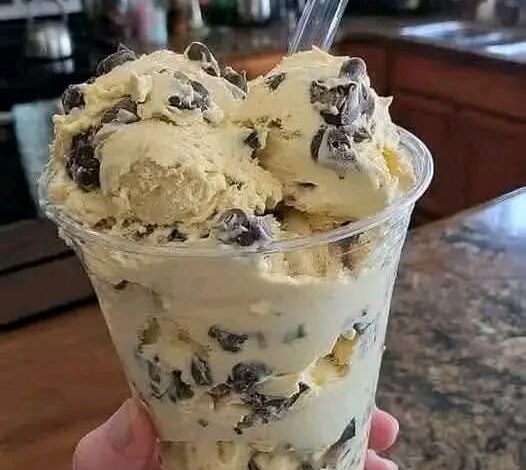
To get that massive, overflowing cup look from the photo, you’re going to need high-quality ingredients. No substitutes allowed if you want that professional “Gelato Shop” texture! 🛒
The Creamy Foundation: 2 Cups of Heavy Whipping Cream (Keep it ice cold until the very last second!).
The Sweet Secret: 1 Can (14 oz) of Sweetened Condensed Milk (This is what makes it “No-Churn” magic).
The Flavor Bomb: 2 Tablespoons of Pure Vanilla Extract (Don’t be shy with the vanilla!).
The “Dough” Factor: 1 Cup of Heat-Treated All-Purpose Flour (Safety first—cook your flour at 350°F for 5 mins before using!).
The Buttery Base: 1/2 Cup of Salted Butter, softened to perfection.
The Sugar Rush: 3/4 Cup of Brown Sugar (for that authentic cookie dough grit).
The Chocolate Rain: 2 Full Cups of Semi-Sweet Chocolate Chunks (Large chunks look better in photos than tiny chips!).
The Finisher: A pinch of Sea Salt to balance out all that glorious sugar.
🥣 THE STEP-BY-STEP BLUEPRINT TO DESSERT HEAVEN 🥣
Phase 1: The Edible Cookie Dough “Chunks” 🍪
Before we touch the cream, we need the stars of the show. In a medium bowl, cream together your softened butter and brown sugar until it’s fluffy. Mix in your heat-treated flour and a splash of vanilla. Now, fold in half of your chocolate chunks. Roll this mixture into tiny, bite-sized balls or just crumble it up. Stick these in the freezer for 20 minutes so they stay firm when mixed!
Phase 2: The Whipped Cloud ☁️
In a large chilled glass bowl, pour in your heavy whipping cream. Use a hand mixer or stand mixer and whip it on high speed until stiff peaks form. You want it thick enough that you could hold the bowl upside down over your head (but maybe don’t actually try that!).
Phase 3: The Marriage of Flavors 💍
Slowly fold in your can of sweetened condensed milk and the rest of the vanilla extract. Use a spatula and be gentle! You don’t want to deflate all that beautiful air you just whipped into the cream. This is the “Liquid Gold” stage.
Phase 4: The Overload Process 🍫
Take your frozen cookie dough bits and the remaining chocolate chunks. Fold them into the cream mixture. Reserve a handful of the biggest chocolate pieces to press into the top later—aesthetic is everything!
Phase 5: The Deep Freeze ❄️
Pour the mixture into a large container (or a giant clear cup if you want to eat it like the picture!). Smooth the top, press in your extra chocolate chunks, and cover it with plastic wrap. Freeze for at least 6 to 8 hours, though overnight is always better for that perfect scoopable texture.
📸 WHY THIS POST IS GOING TO GO VIRAL 📸
Why does everyone want a piece of this? 🍦
Texture Goals: The contrast between the silky smooth cream and the gritty, buttery cookie dough is a party for your taste buds. 🎉
No Machine Needed: You don’t need a $500 ice cream maker. Just a bowl, a mixer, and a dream. 🛠️
Total Customization: Want more chocolate? Add it. Want caramel drizzle? Go for it. This is your kingdom! 👑
The “Pour” Shot: When you scoop this into a tall clear cup, the layers of chocolate and dough look absolutely insane. 🤤
💡 PRO-TIPS FOR THE PERFECT DESSERT SELFIE 💡
The “Tall Cup” Hack: Use a clear plastic or glass tumbler to show off the “marbling” of the chocolate throughout the scoop.
The Lighting: Stand near a window. Natural light makes the vanilla cream look bright and the chocolate look rich and glossy. ☀️
The Spoon: Use a clear acrylic spoon or a vintage silver one to add that extra “luxury” vibe to your photo.
DROP A “🍪” IN THE COMMENTS IF YOU WANT A BITE! Hit that LIKE button and SHARE this with the biggest sweet tooth you know! Don’t forget to FOLLOW for more recipes that make life delicious! 🍦💖